
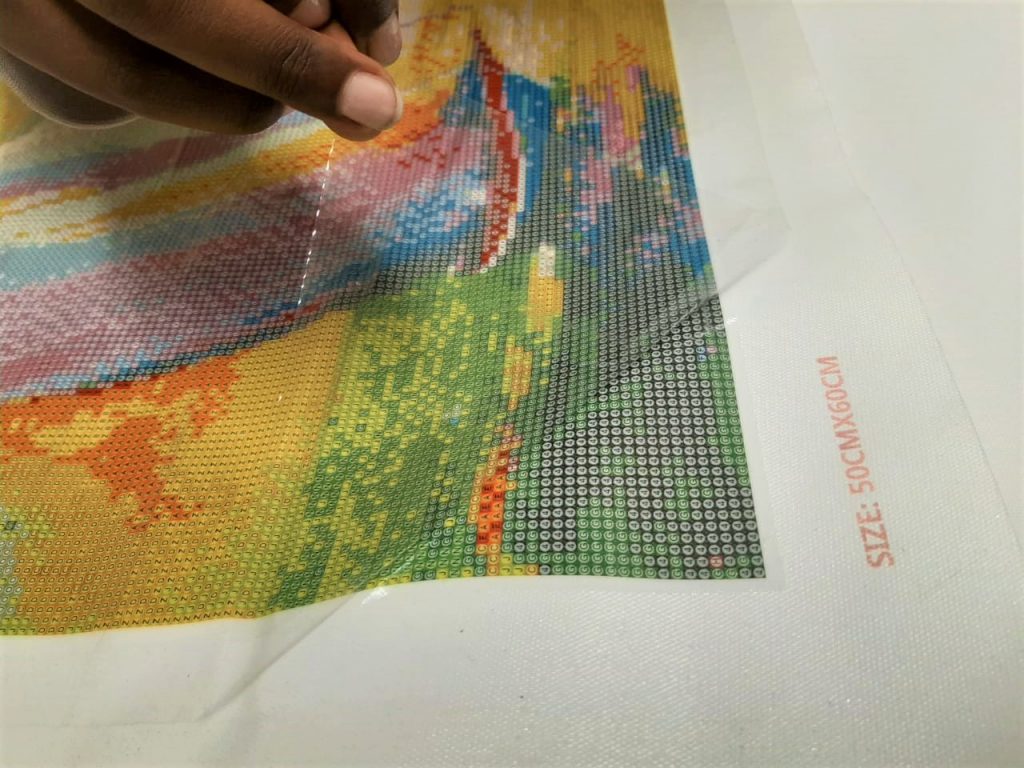
So, you’re a first-time diamond dotter. Perhaps you have your Diamond-Dot Painting design already but don’t know where to start. But relax. We’re here to help you. Yes, there are things you should and shouldn’t do. But for the most part, it is pretty straightforward. This is not a difficult craft. In fact, you can pick it up quite easily. And it’s therapeutic and wonderful! But to make it a pleasant experience there are a few things we recommend you DO NOT do. Removing all of it in one go will turn sticky and messy. Not only will you have a hard time maneuvering around, but the exposed sticky layer will attract dust and hair. Not a pretty sight! By the time you finish your design (if you haven’t gone into a fit of rage already), you will find it quite annoying and repulsive when you see the amount of floating grunge that has embedded itself onto your canvas. So, the trick is not to remove the whole plastic film. Instead, do your diamond dot painting in sections large enough for you to handle before the dirt starts to get in the way. You can do this by peeling back a small section and dotting that area. Once you are done then you can peel back further and complete that section. Once that area is complete you can either fold the plastic back down or cut away the excess. Let’s say in all the excitement you peeled off the entire plastic film. Don’t panic. There is a way out of this. Please don’t think that wax paper or cling film are good alternatives. They’re not. If you haven’t thrown away the plastic film then reapply it as carefully and as straight as possible. The only possible substitute is the paper used to cover the sticky stuff you use to wrap school books. You can find this in rolls at a stationery shop. Your beads have come in separate bags for a reason. Some beads may look very similar in colour but they are not. Trust me. The wide range of shades makes it possible for your diamond painting to have that fabulous end result. Sometimes two colours may look the same but they make a world of difference on the design. The way the design has been conceived makes sure that the colours are as true to the original picture as it can be. Substituting one colour with another (even if it’s one shade away) could potentially wreck the completed design. It’s not to say it will definitely not work. We will be happy to assist you in picking a suitable replacement colour for your Diamond-Dot Painting. For assistance just email support@diamonddotpainting.dk. As tempting as it may be, please resist pouring the entire contents of the packet into the tray. It will be hard to scoop up or pick out a dot with your applicator pen. Basically, you won’t be able to line up the diamond dots to use the 3 or 6 dot applicator. The trick is to gauge the area and tip out just enough to cover it. If it’s a dense area then do it in stages. Bit by bit. Rolling your design inwards will result in the beads popping off. Roll it outwards to keep the beads intact. You can slot it back into the box this way if you still have the packaging with you. Roll it like this. These are all suggestions that were learned the hard way. If you have any other lessons you learned the hard way then please send us a message so that we can add it to this list.
Important instructions - before you get started
Do Not Remove the Plastic Film cover

Do not use an alternative to the Plastic Film
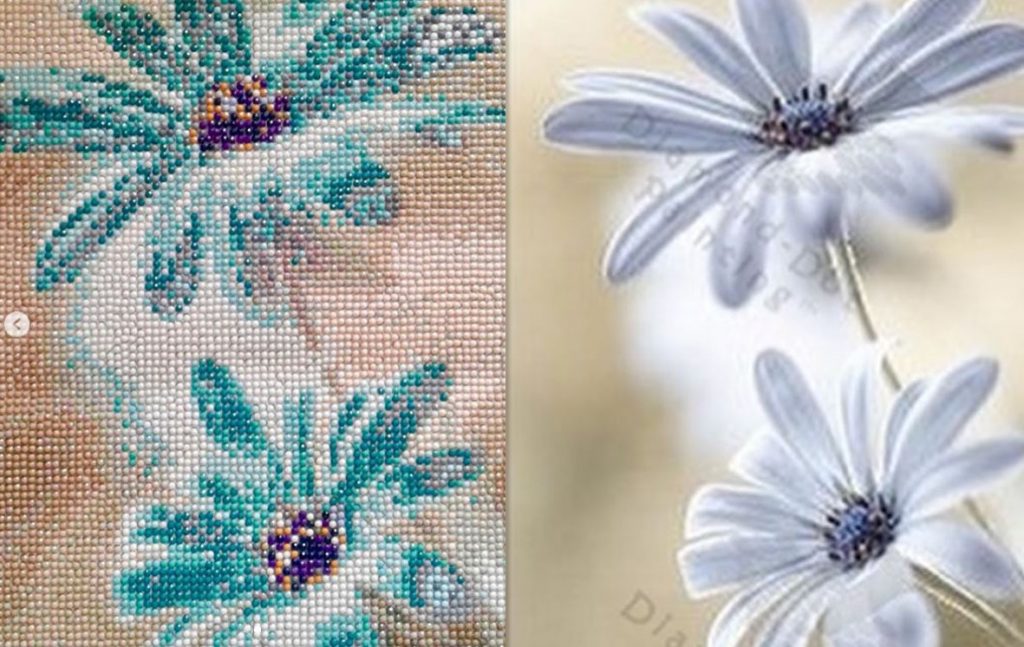
Do Not Combine Colours
Do Not Substitute Colours
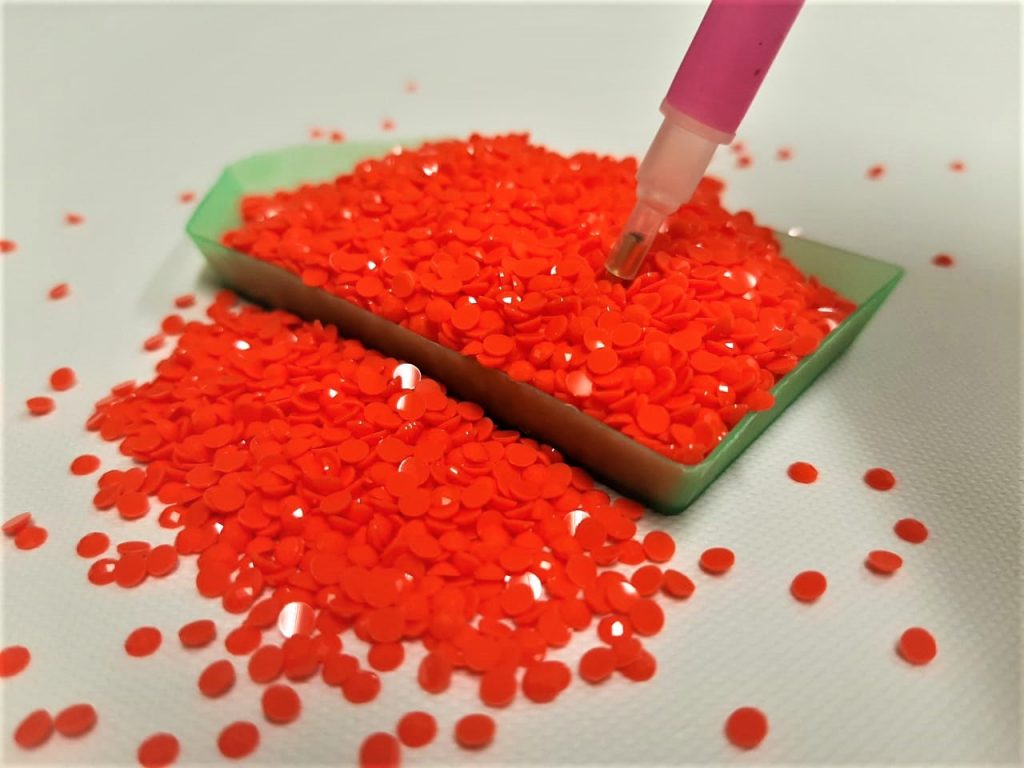
Do Not Fill Your Tray

Do Not Roll Your Design Inward


We are referring to the plastic film that protects the sticky part of the canvas.